In this article, you can read how to secure a Remindo exam with Schoolyear through the integration.
Step-by-step
- Log in to Remindo.

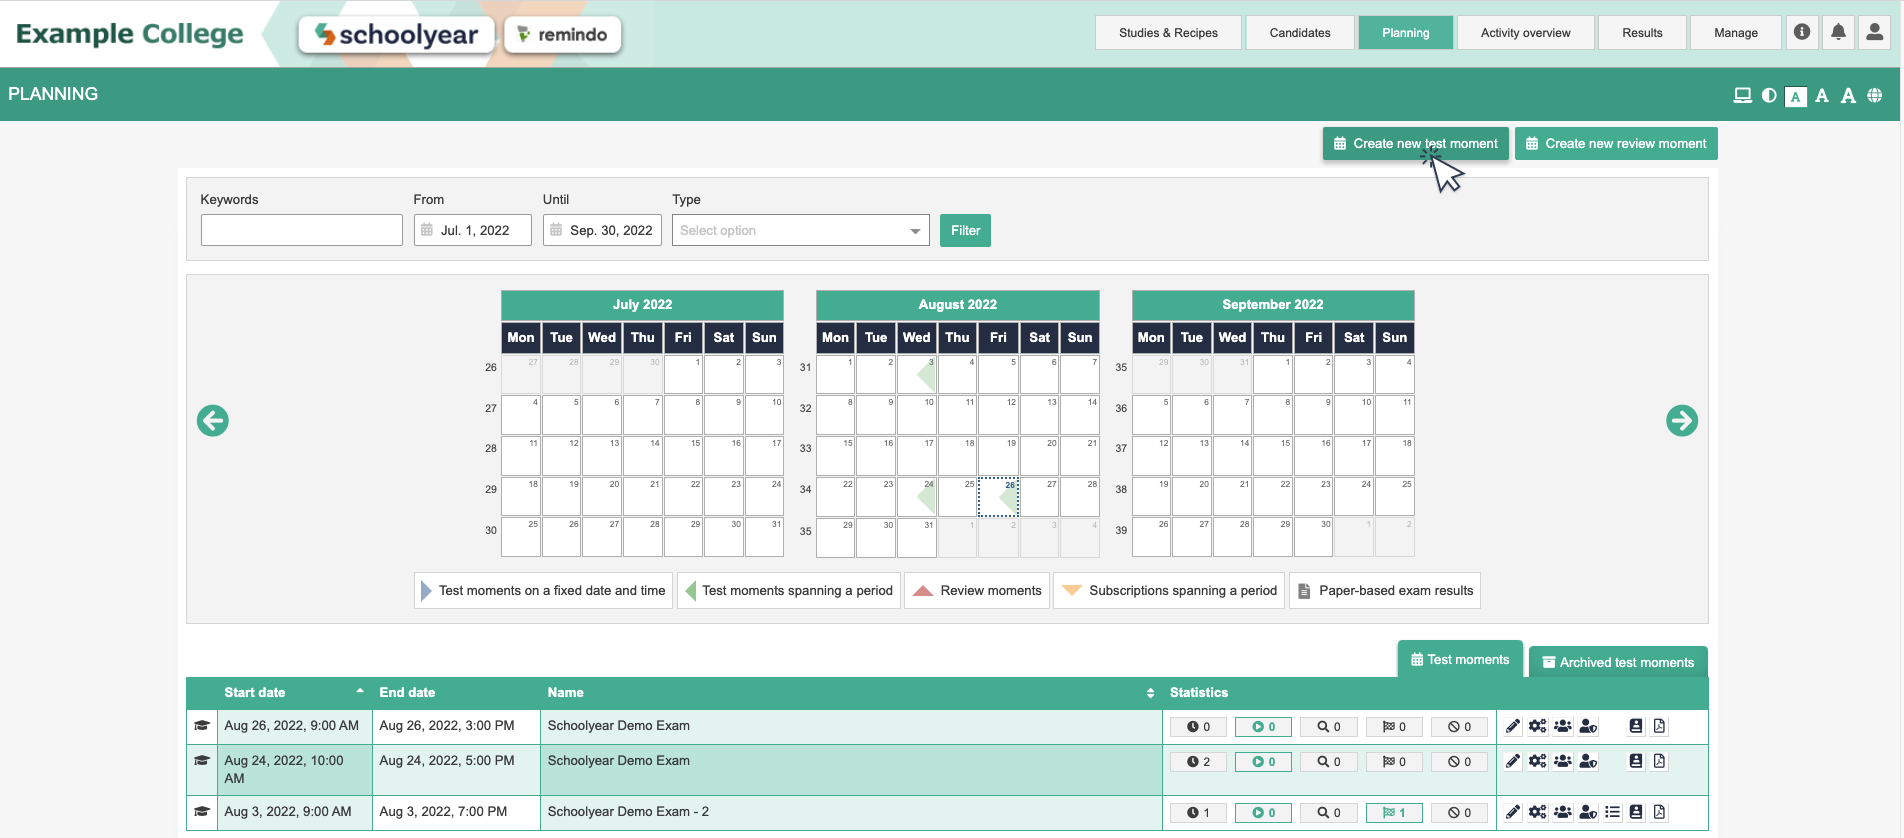
- Click 'Create new test moment'.
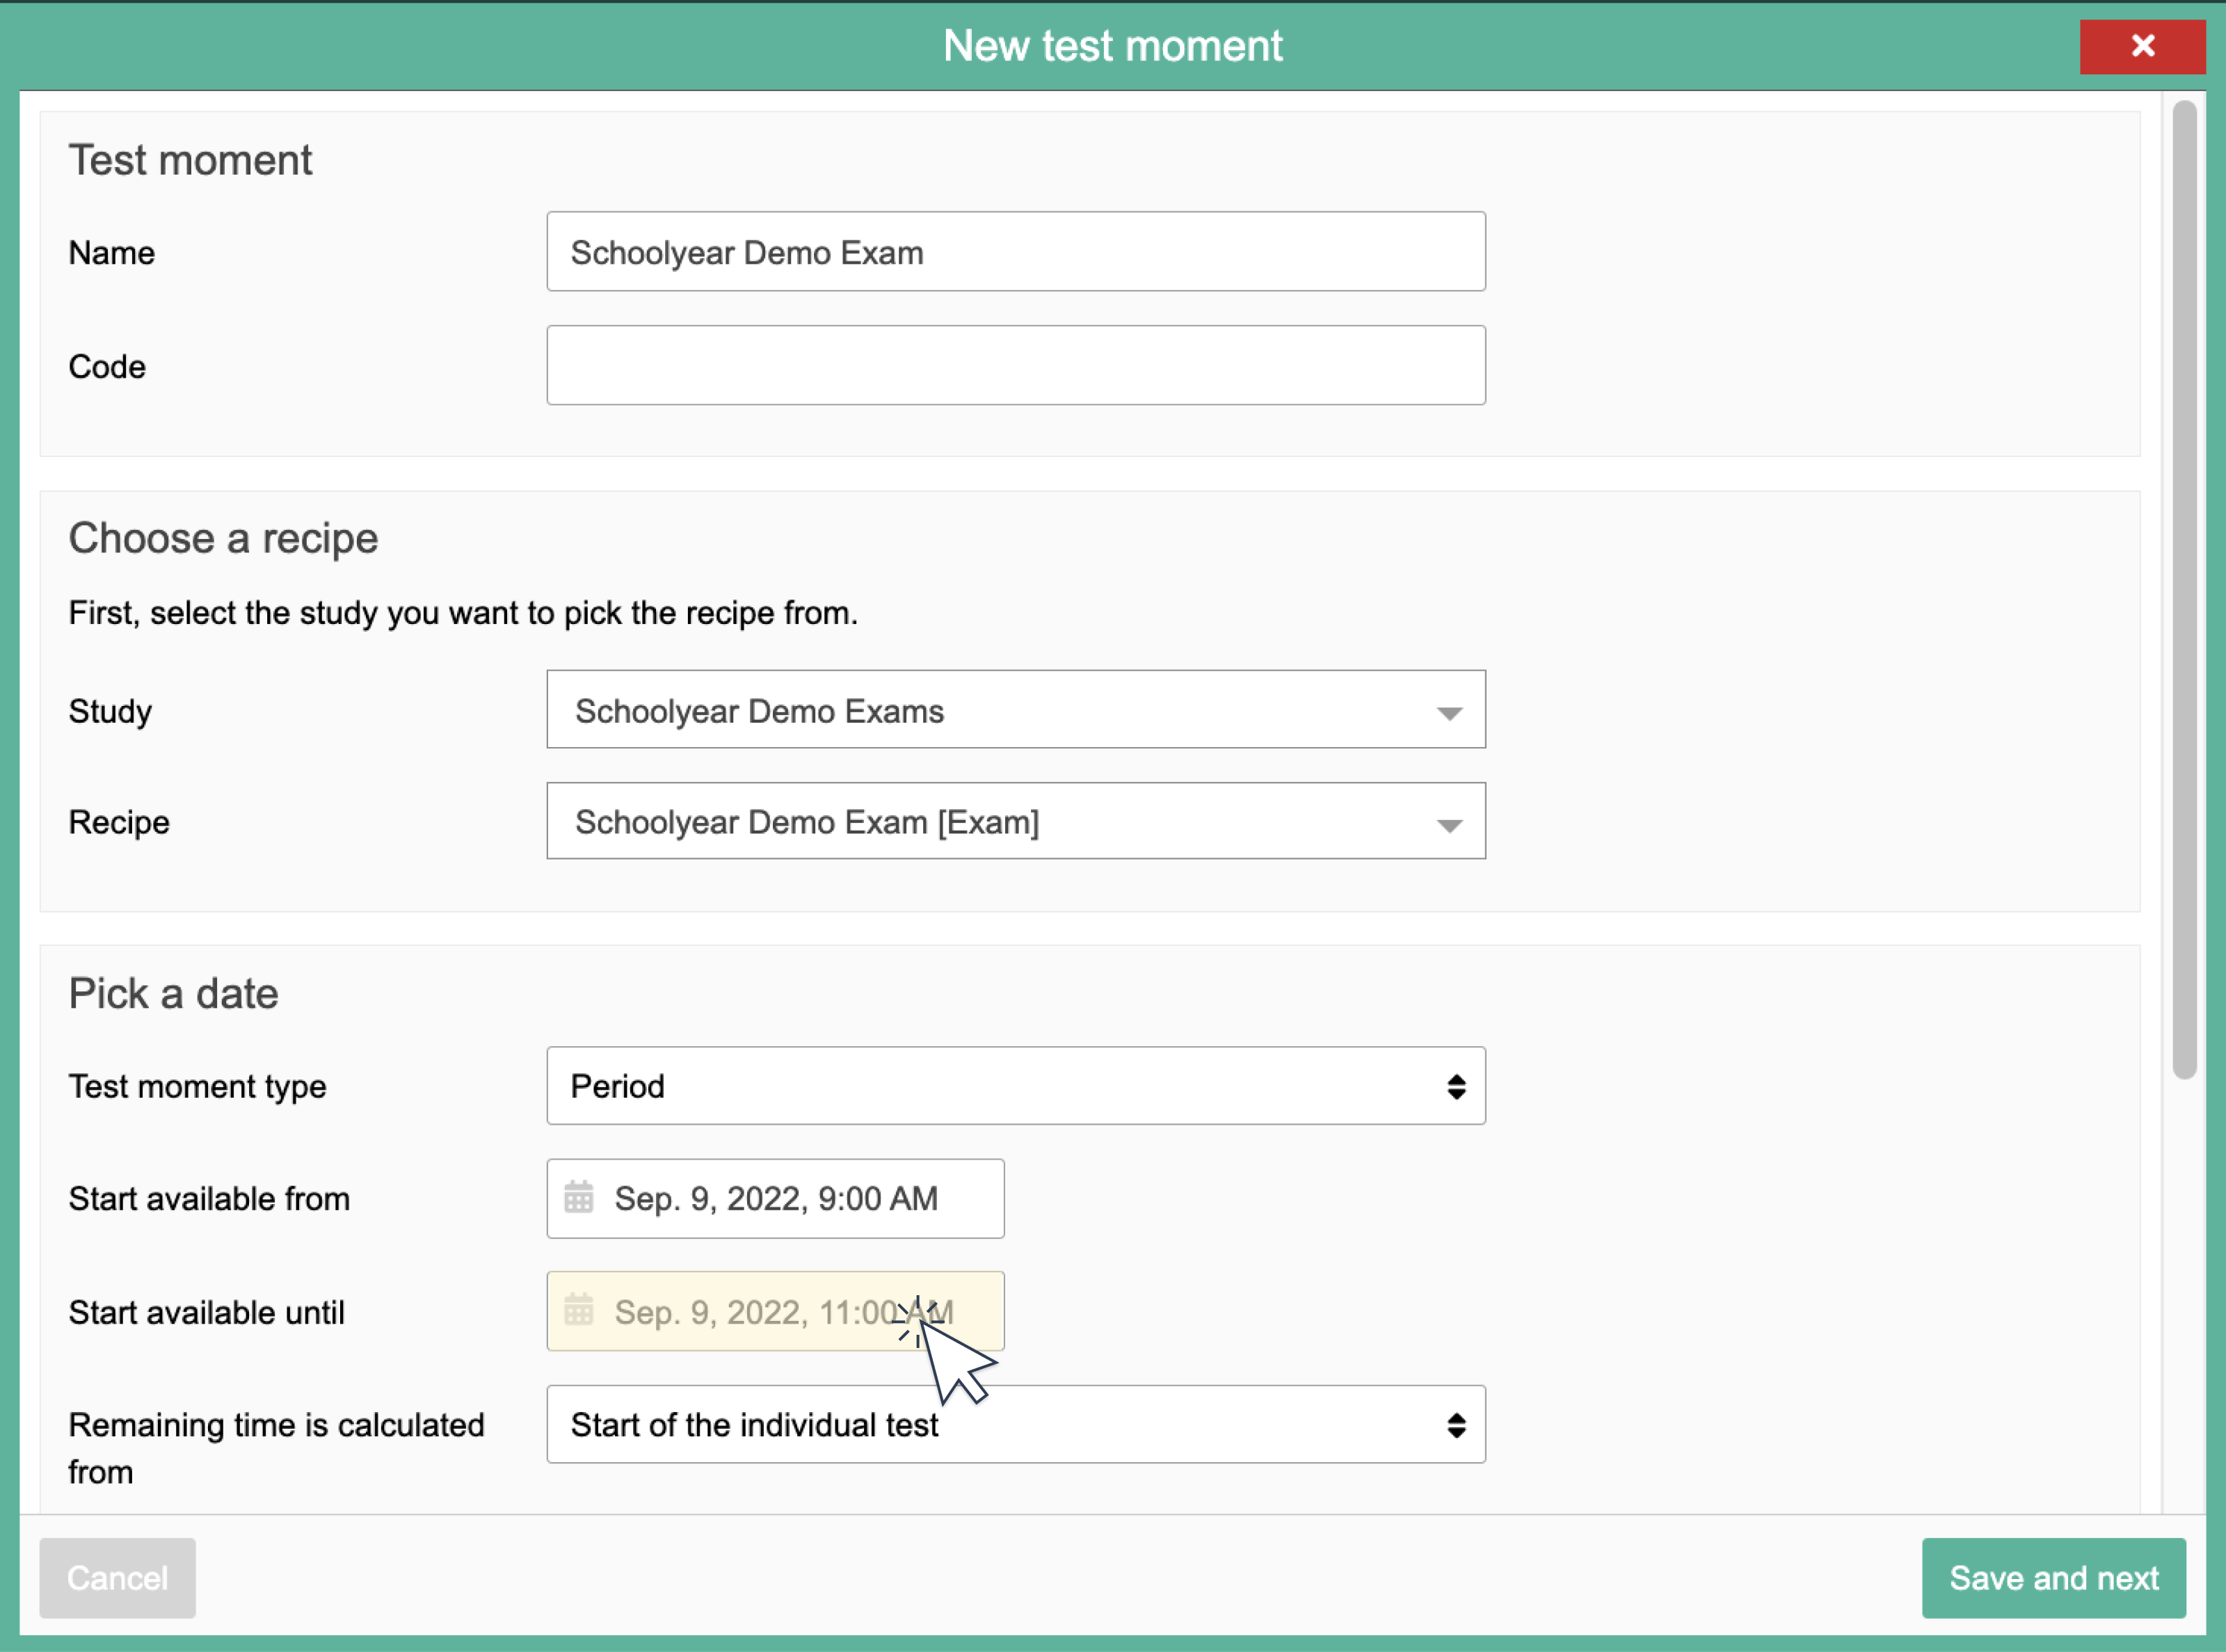
- Go to 'Pick a date' and choose test moment type 'Period'. Choose a period that is less than 24h.
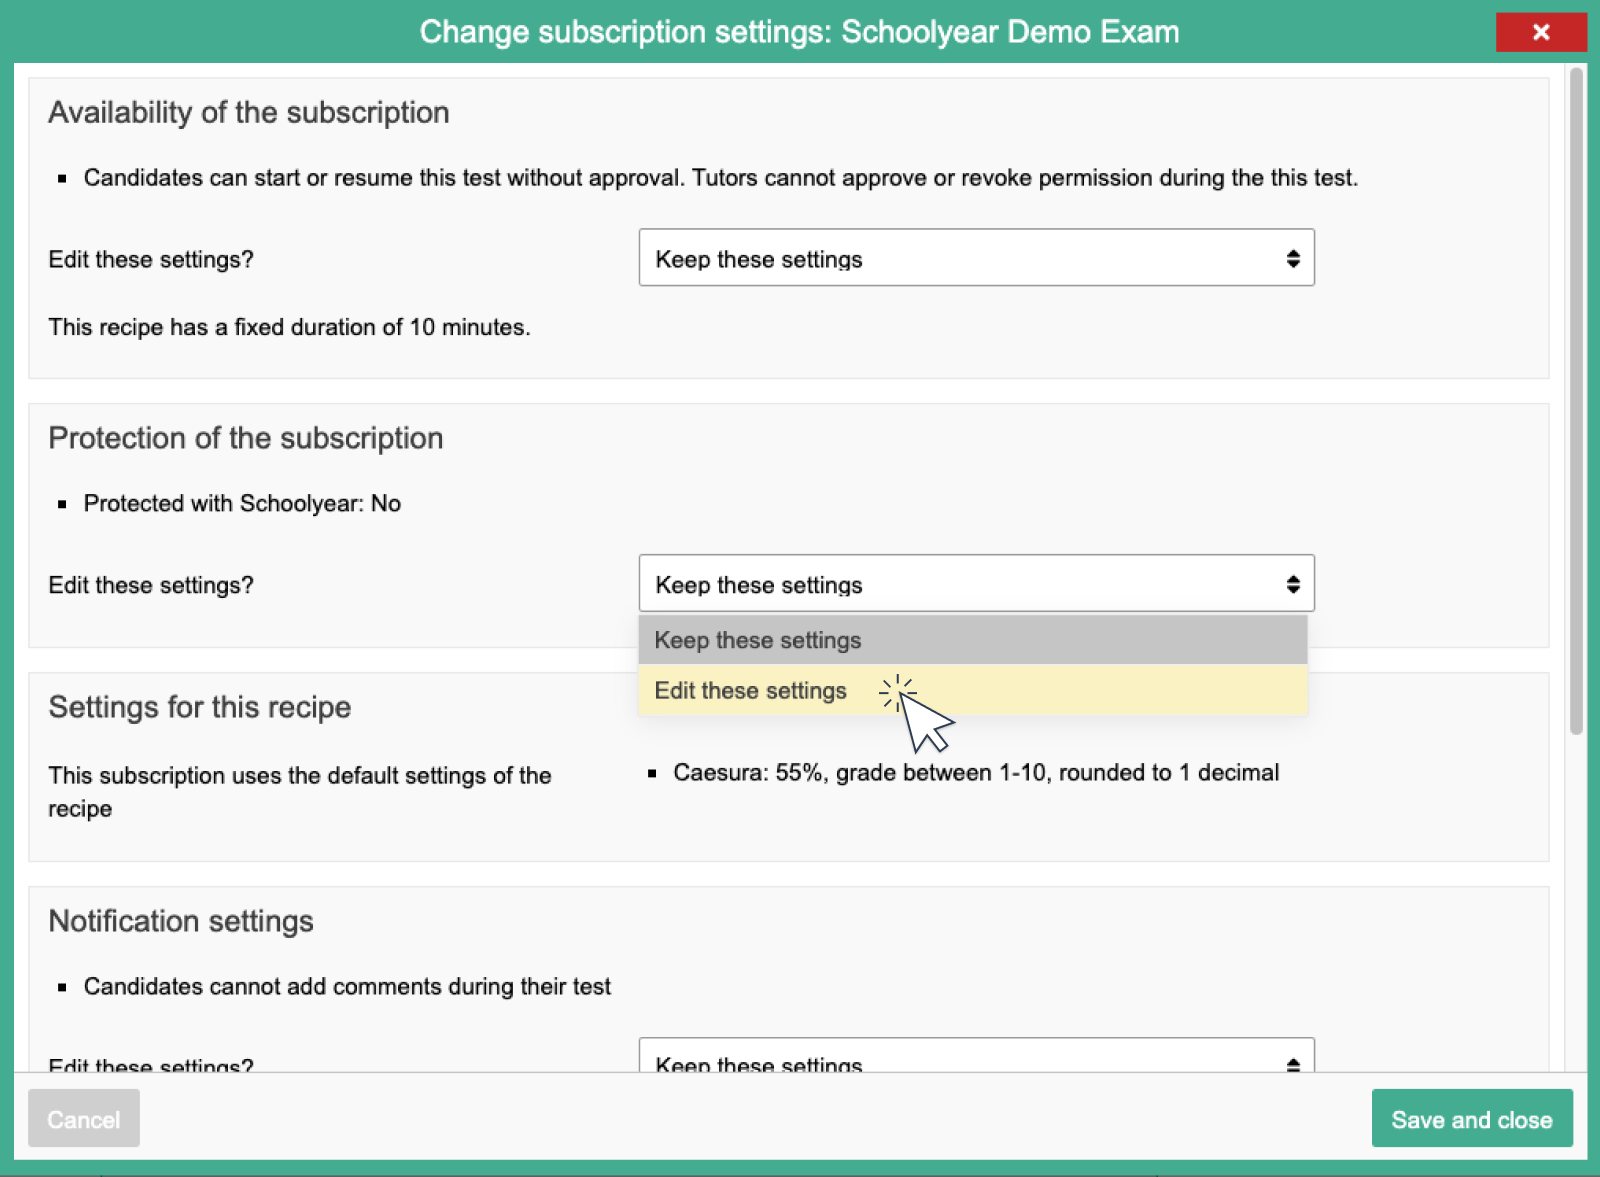
- Go to the second page to the section 'Protection of the subscription'. Does it say 'Protected with Schoolyear: yes'? Then your settings are correct. You can then go to step 6 and save the exam. Does it say 'Protected with Schoolyear: no'? Then the Schoolyear security is not activated yet. Change the settings by clicking the dropdown box next to 'Edit these settings?'. Choose 'Edit these settings'.
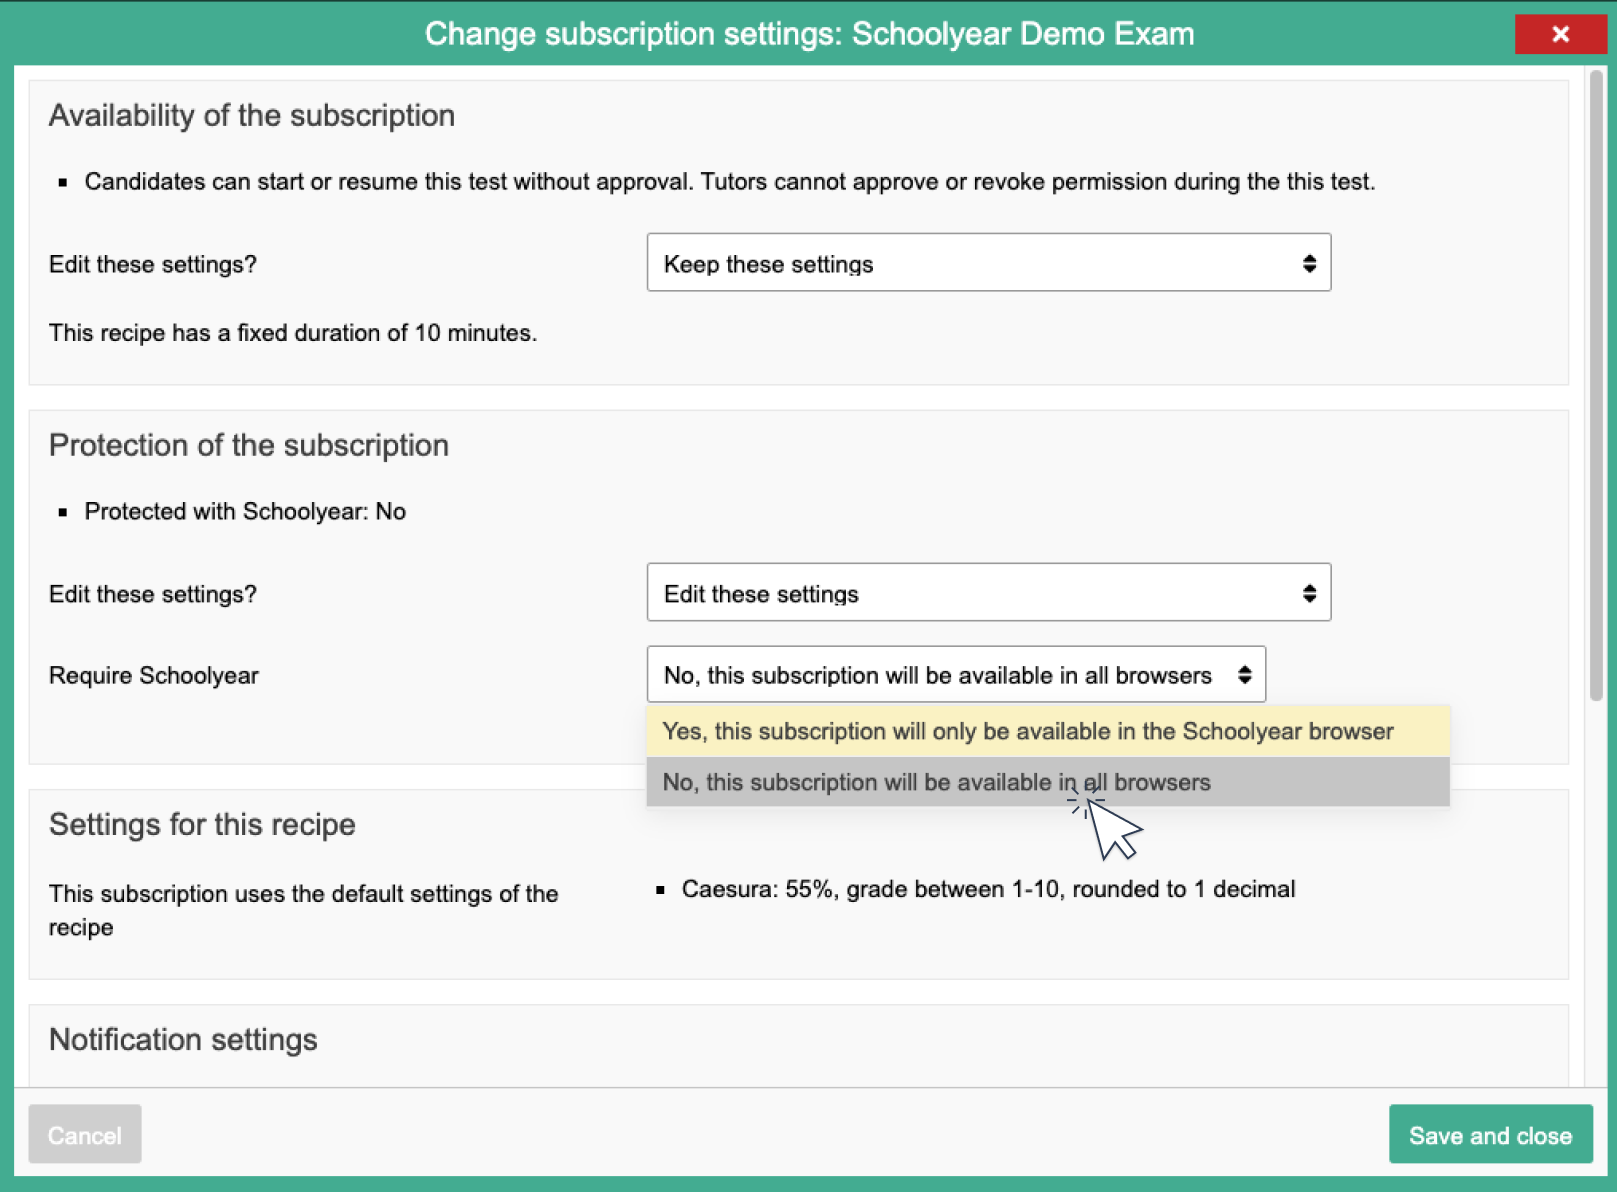
- A new dropdown box will appear. Choose 'Yes this subscription will only be in the Schoolyear browser'.
- The button 'Open Schoolyear settings' appears. Here you can customise the security settings including allowing extra URLs to be used during the exam.
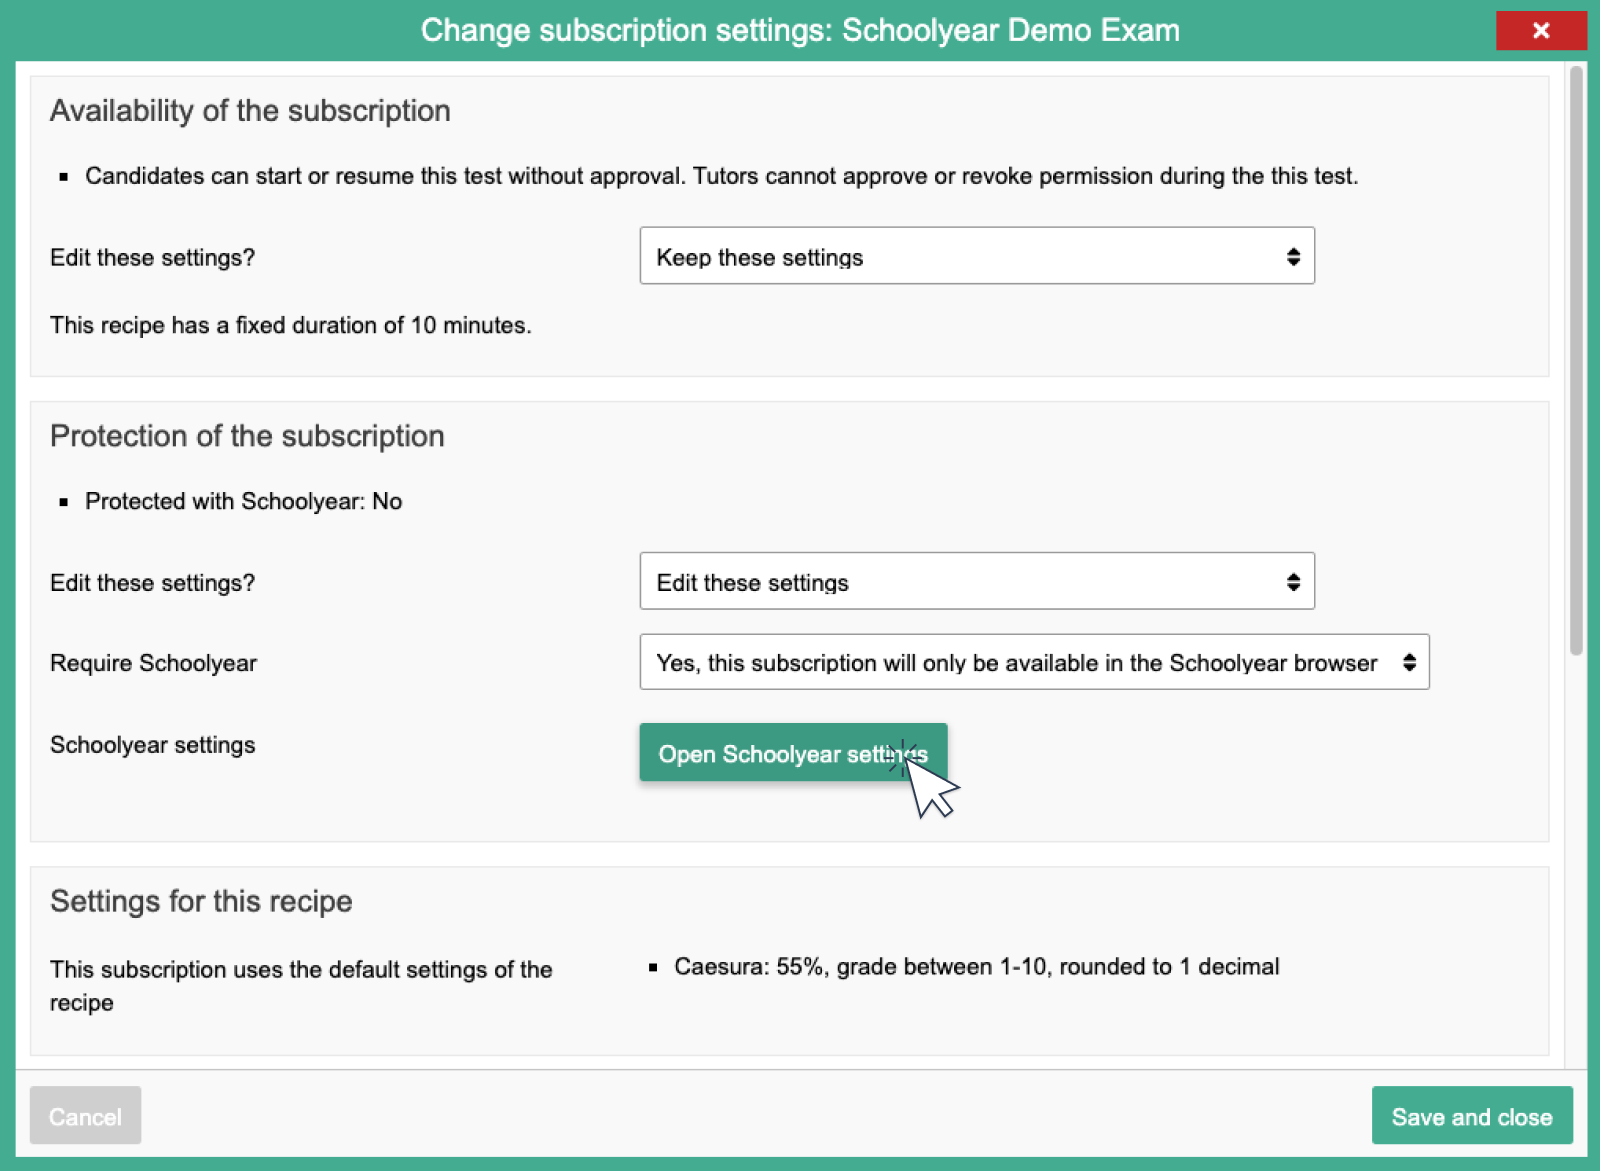
- Choose 'save and close' to save the exam. You are now in the 'Planning' overview.
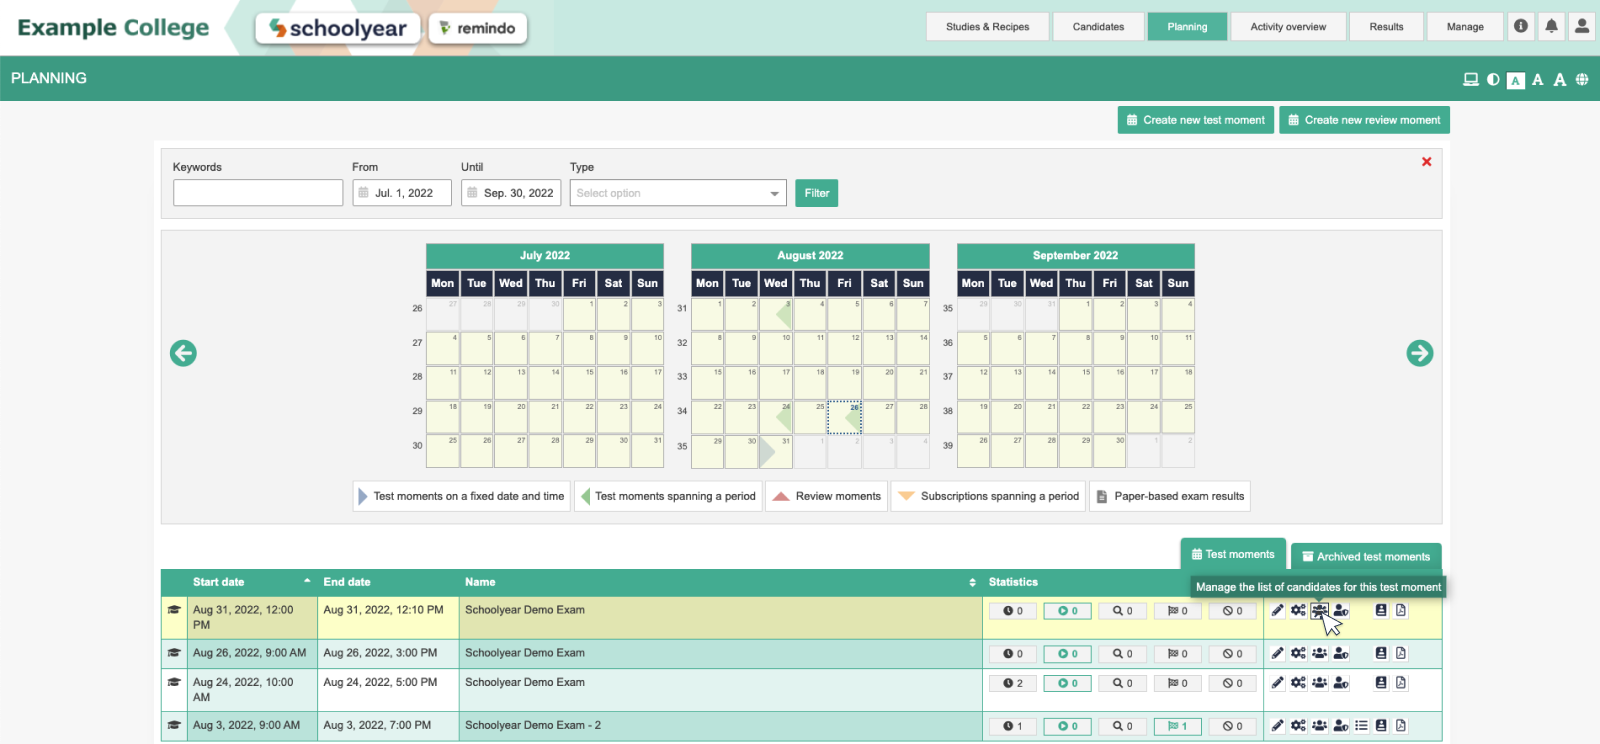
- Add candidates (students) to the exam by clicking the candidate icon from the 'Planning' overview.

- Through the button 'Activity Overview' you can find the overview including your created exam. Please note: You must first add candidates to the exam (step 8) in order to make the exam visible in the 'Activity Overview'. From this page, it is possible to open the Schoolyear dashboard by clicking 'Schoolyear Proctor dashboard'.

The exam is now ready. Students can start taking the exam at the specified time.
